Isolator/Auxiliary Start Panel
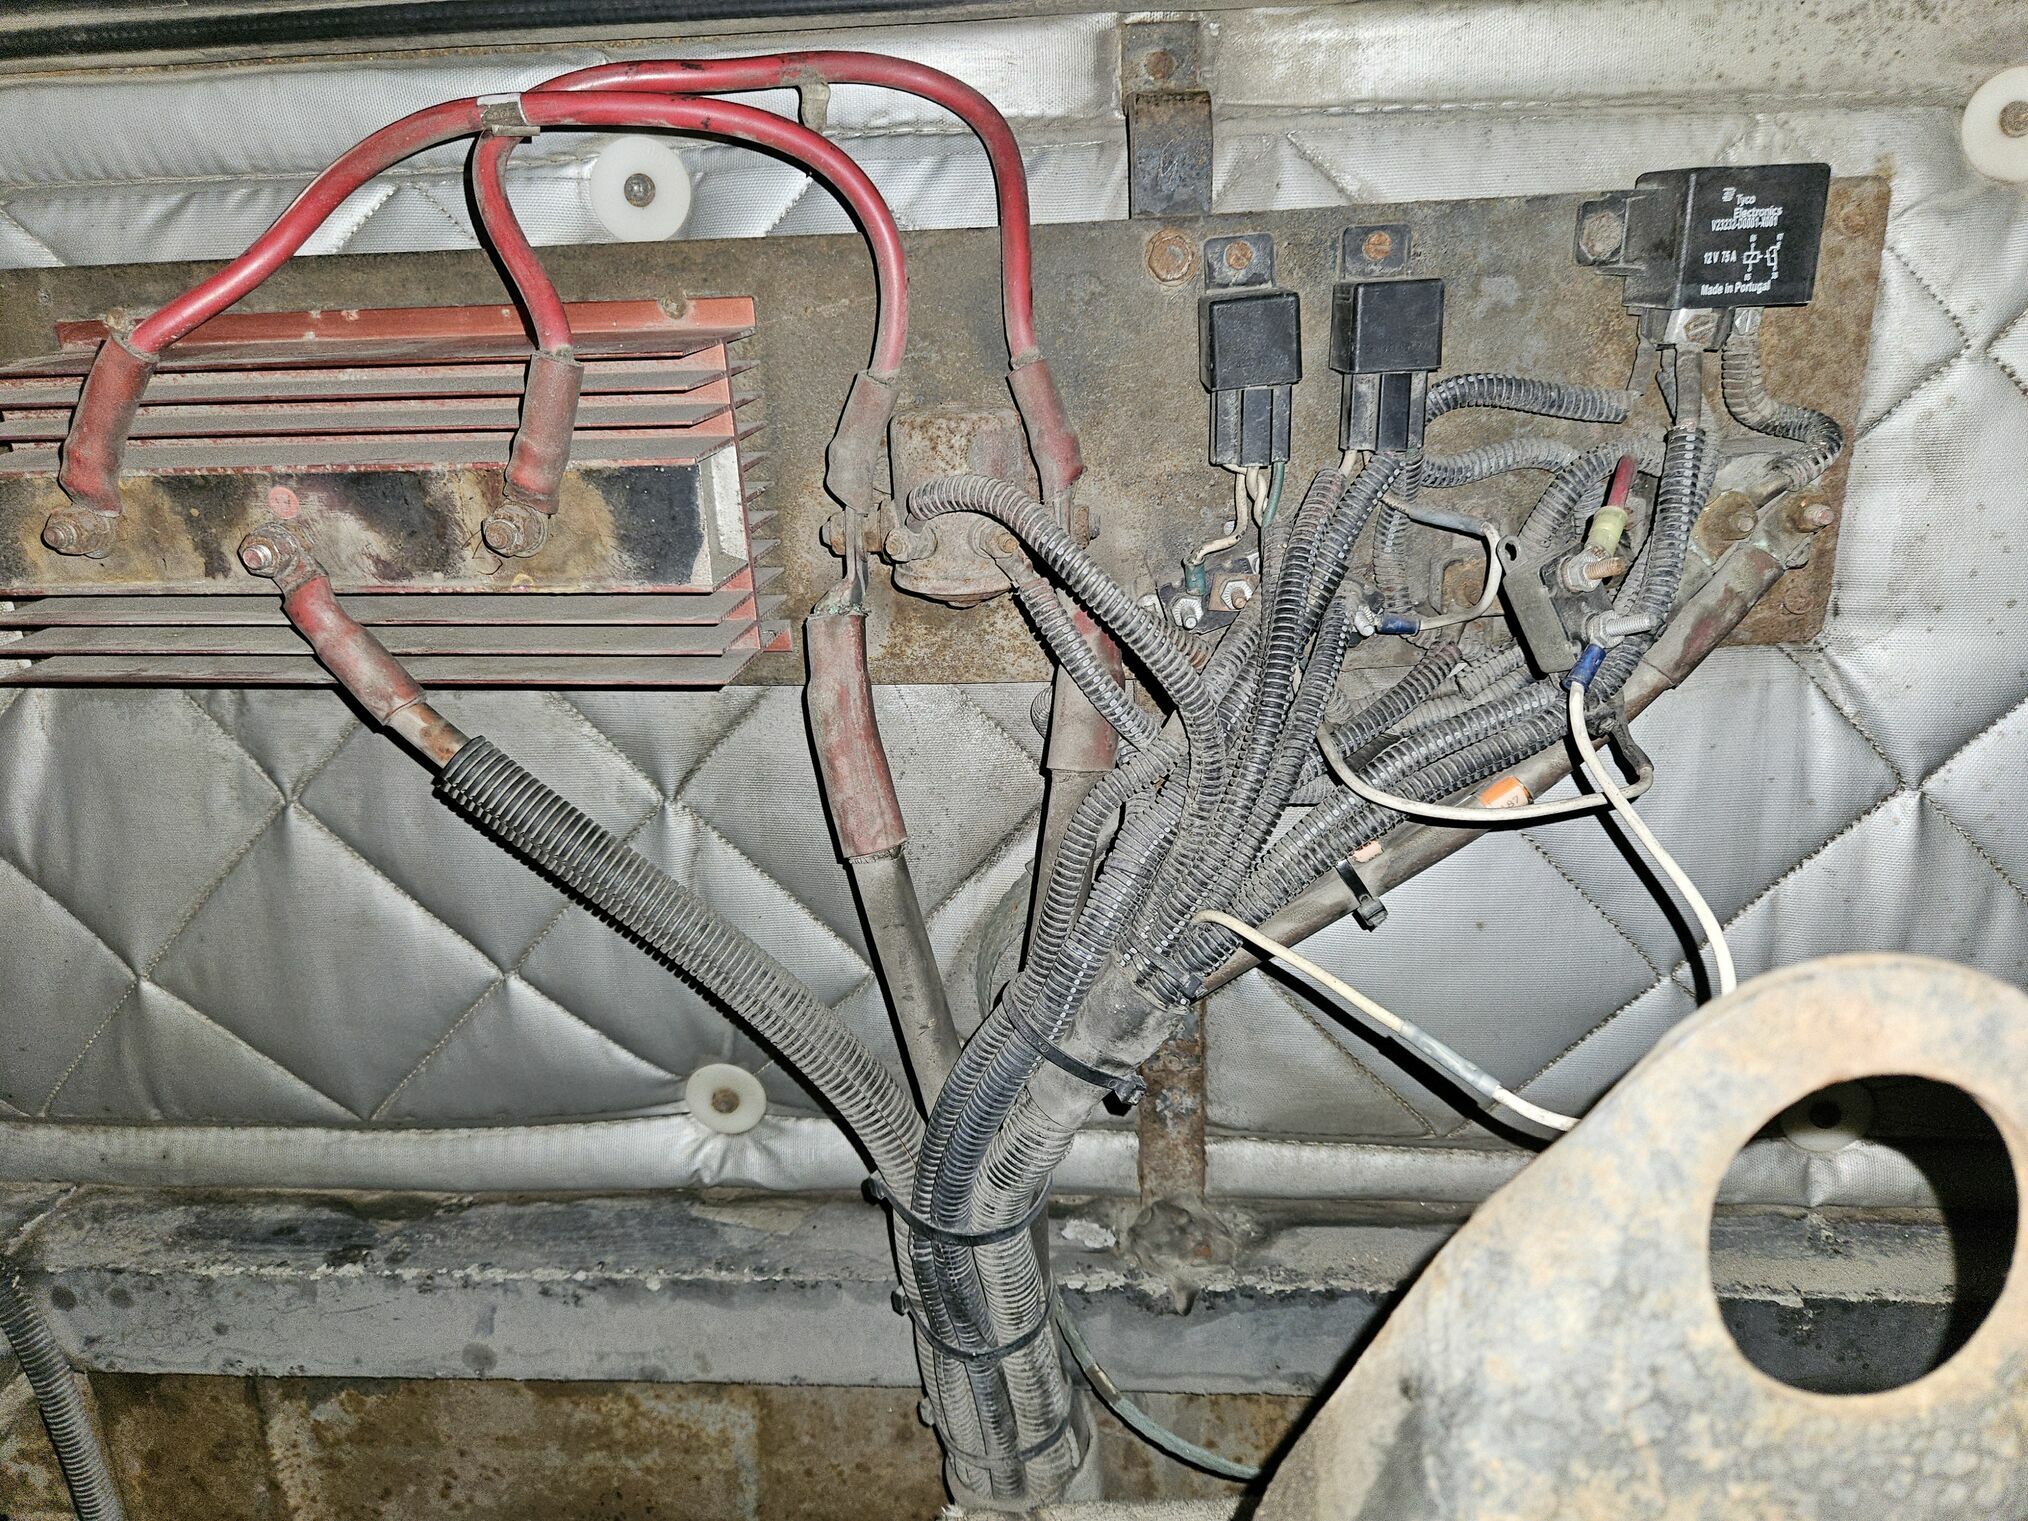
This was how our panel started. We felt it was time to replace and renew a few things. Ours is located on the far wall inside the engine compartment / under the bed.
Goals
- Use an Orion DC/DC charger in place of the isolator. Using an Orion made sense for us because we have switched to Victron equipment and LiFepO4 on the house side. You can program the Orion with the specifications for the batteries you are charging; these can be obtained from the battery manufacturer. In addition to Bluetooth, it supports VE.Direct communications, which allows us to control it and monitor the condition of the batteries via smartphone or the touch panel on the Cerbo.
- We were experiencing indications of low dashboard gauge voltage one day and normal the next. After ruling out connections and the alternator, the next possibility was that the Isolator maybe starting to malfunction and was preventing voltage from reaching the batteries.
-

Replace the boost solenoid; the connections on it were crusty, and it was beginning to resemble a geode after 25 years in the engine compartment environment.
-

Clean up the relays/breaker wiring. At some point this area had been modified by moving the voltage sense/remote start wiring from the A/C compressor breaker to a dedicated one. This new breaker and its wiring were just “hanging out”.
-

Replace the 90A fuse and remote start relay. This fuse feeds the dashboard power relay panel in front of the passenger seat; after 25 years in the engine compartment, it has done its job. The remote start relay worked, but I had one in much better condition from when I updated the ignition solenoids
-
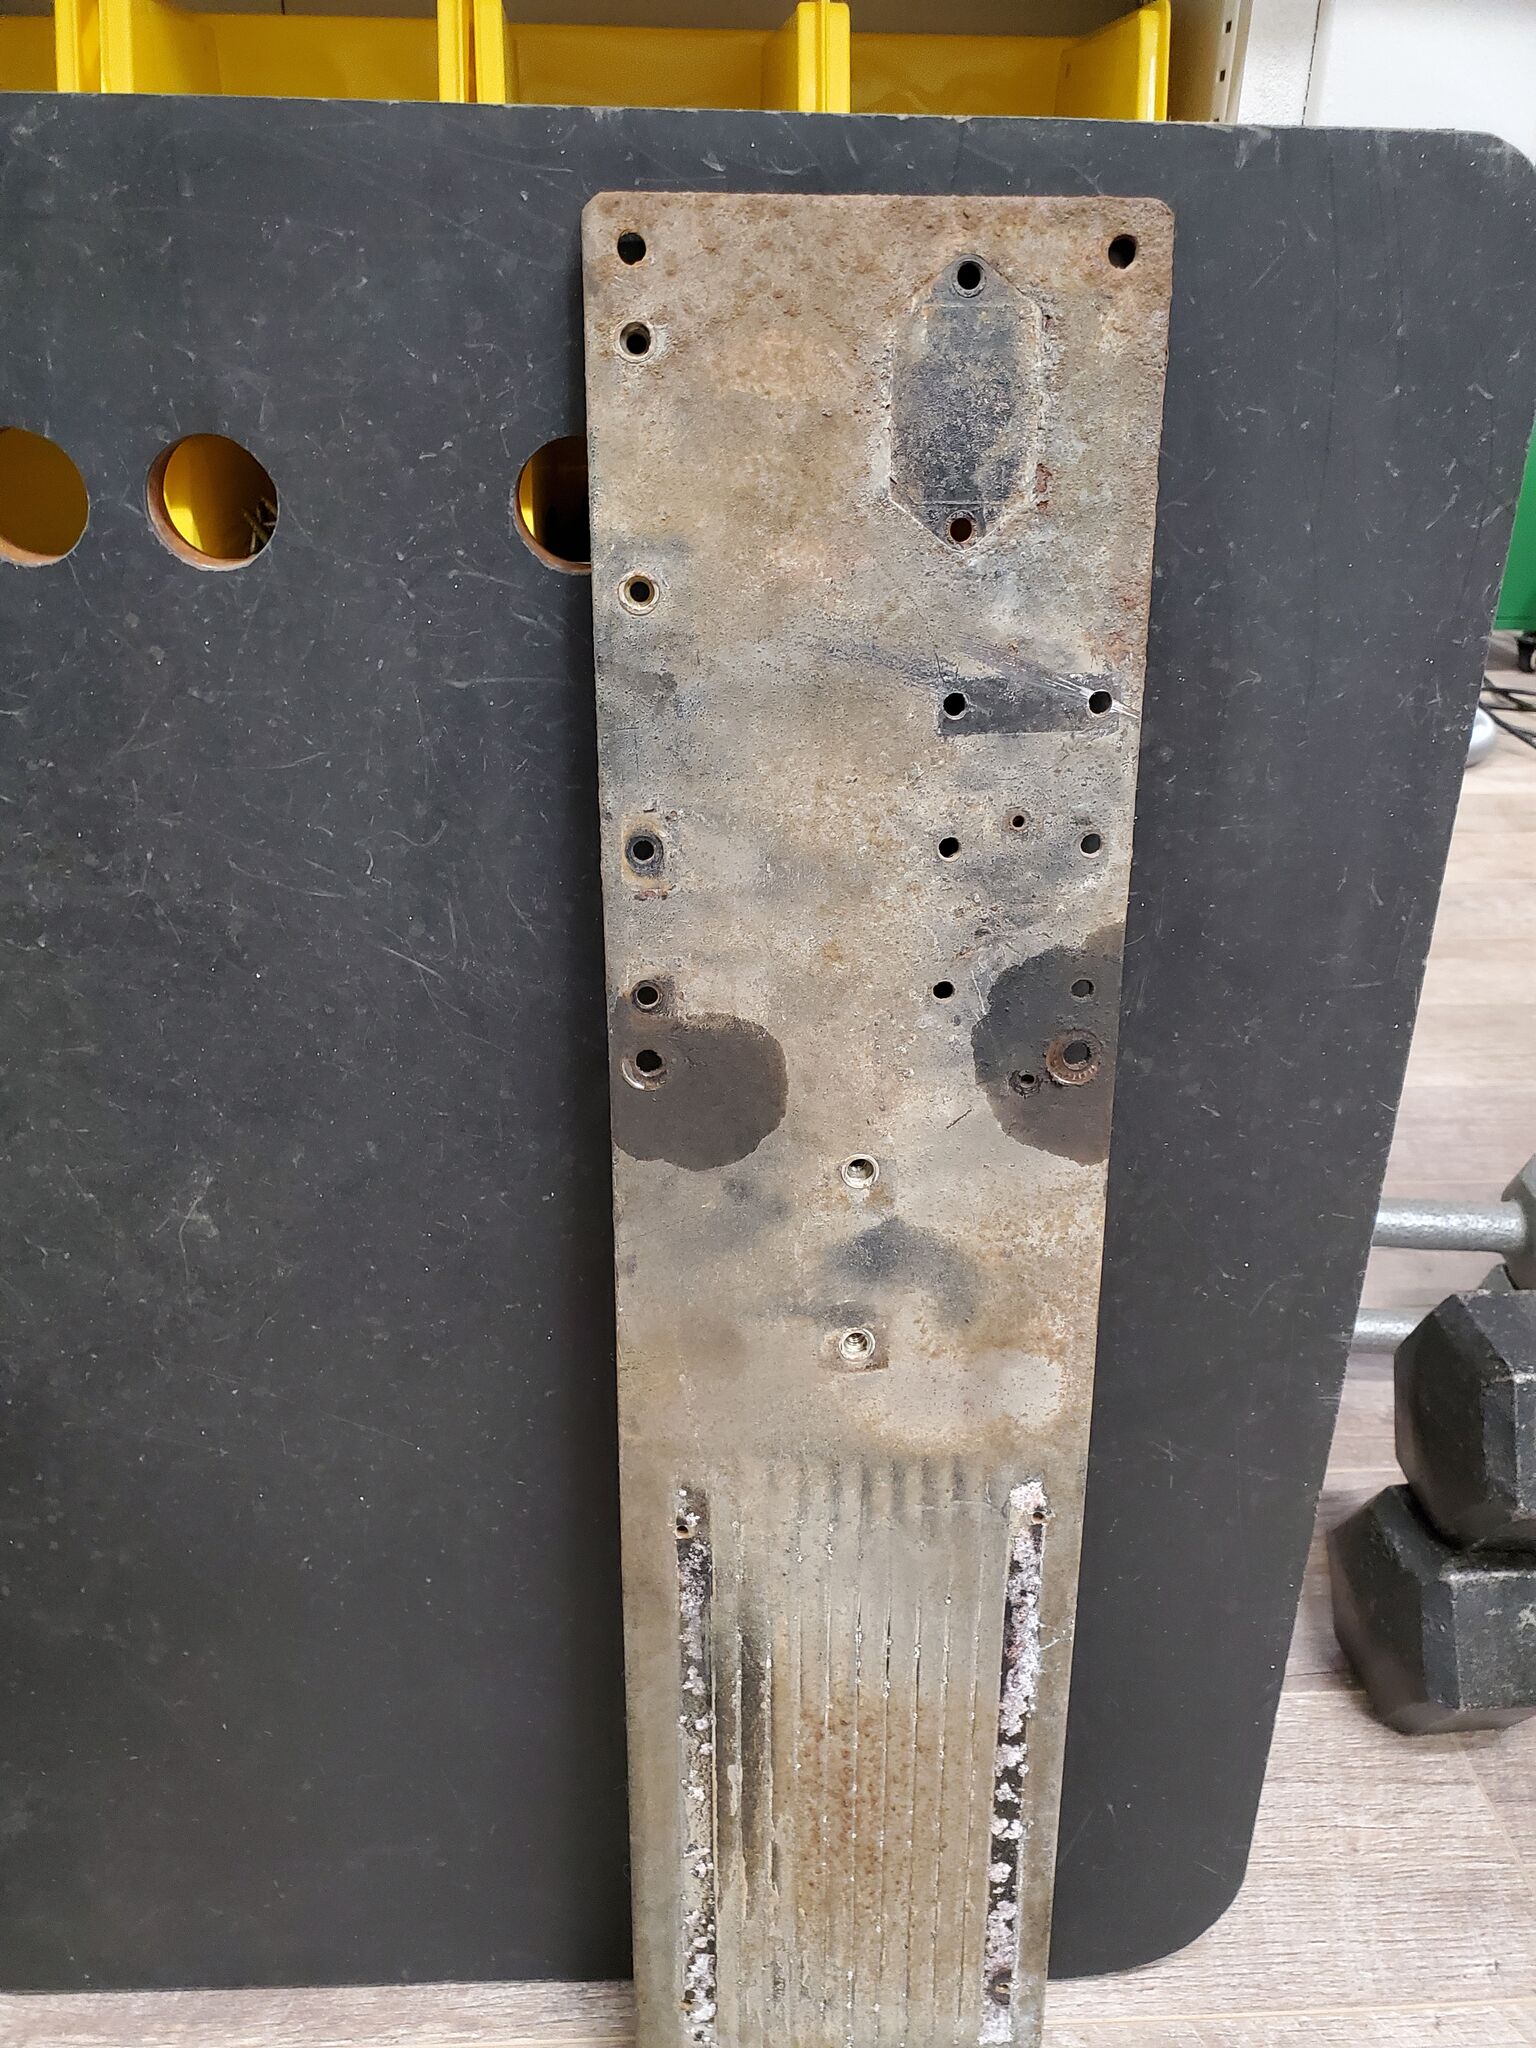
Clean up the mounting plate and all the component mounting. It had a mixture of through bolts/nuts, rivnuts, and self-tapping screws. Additionally, the way it was secured to the rear wall caused a side to side bow in the plate.
Results
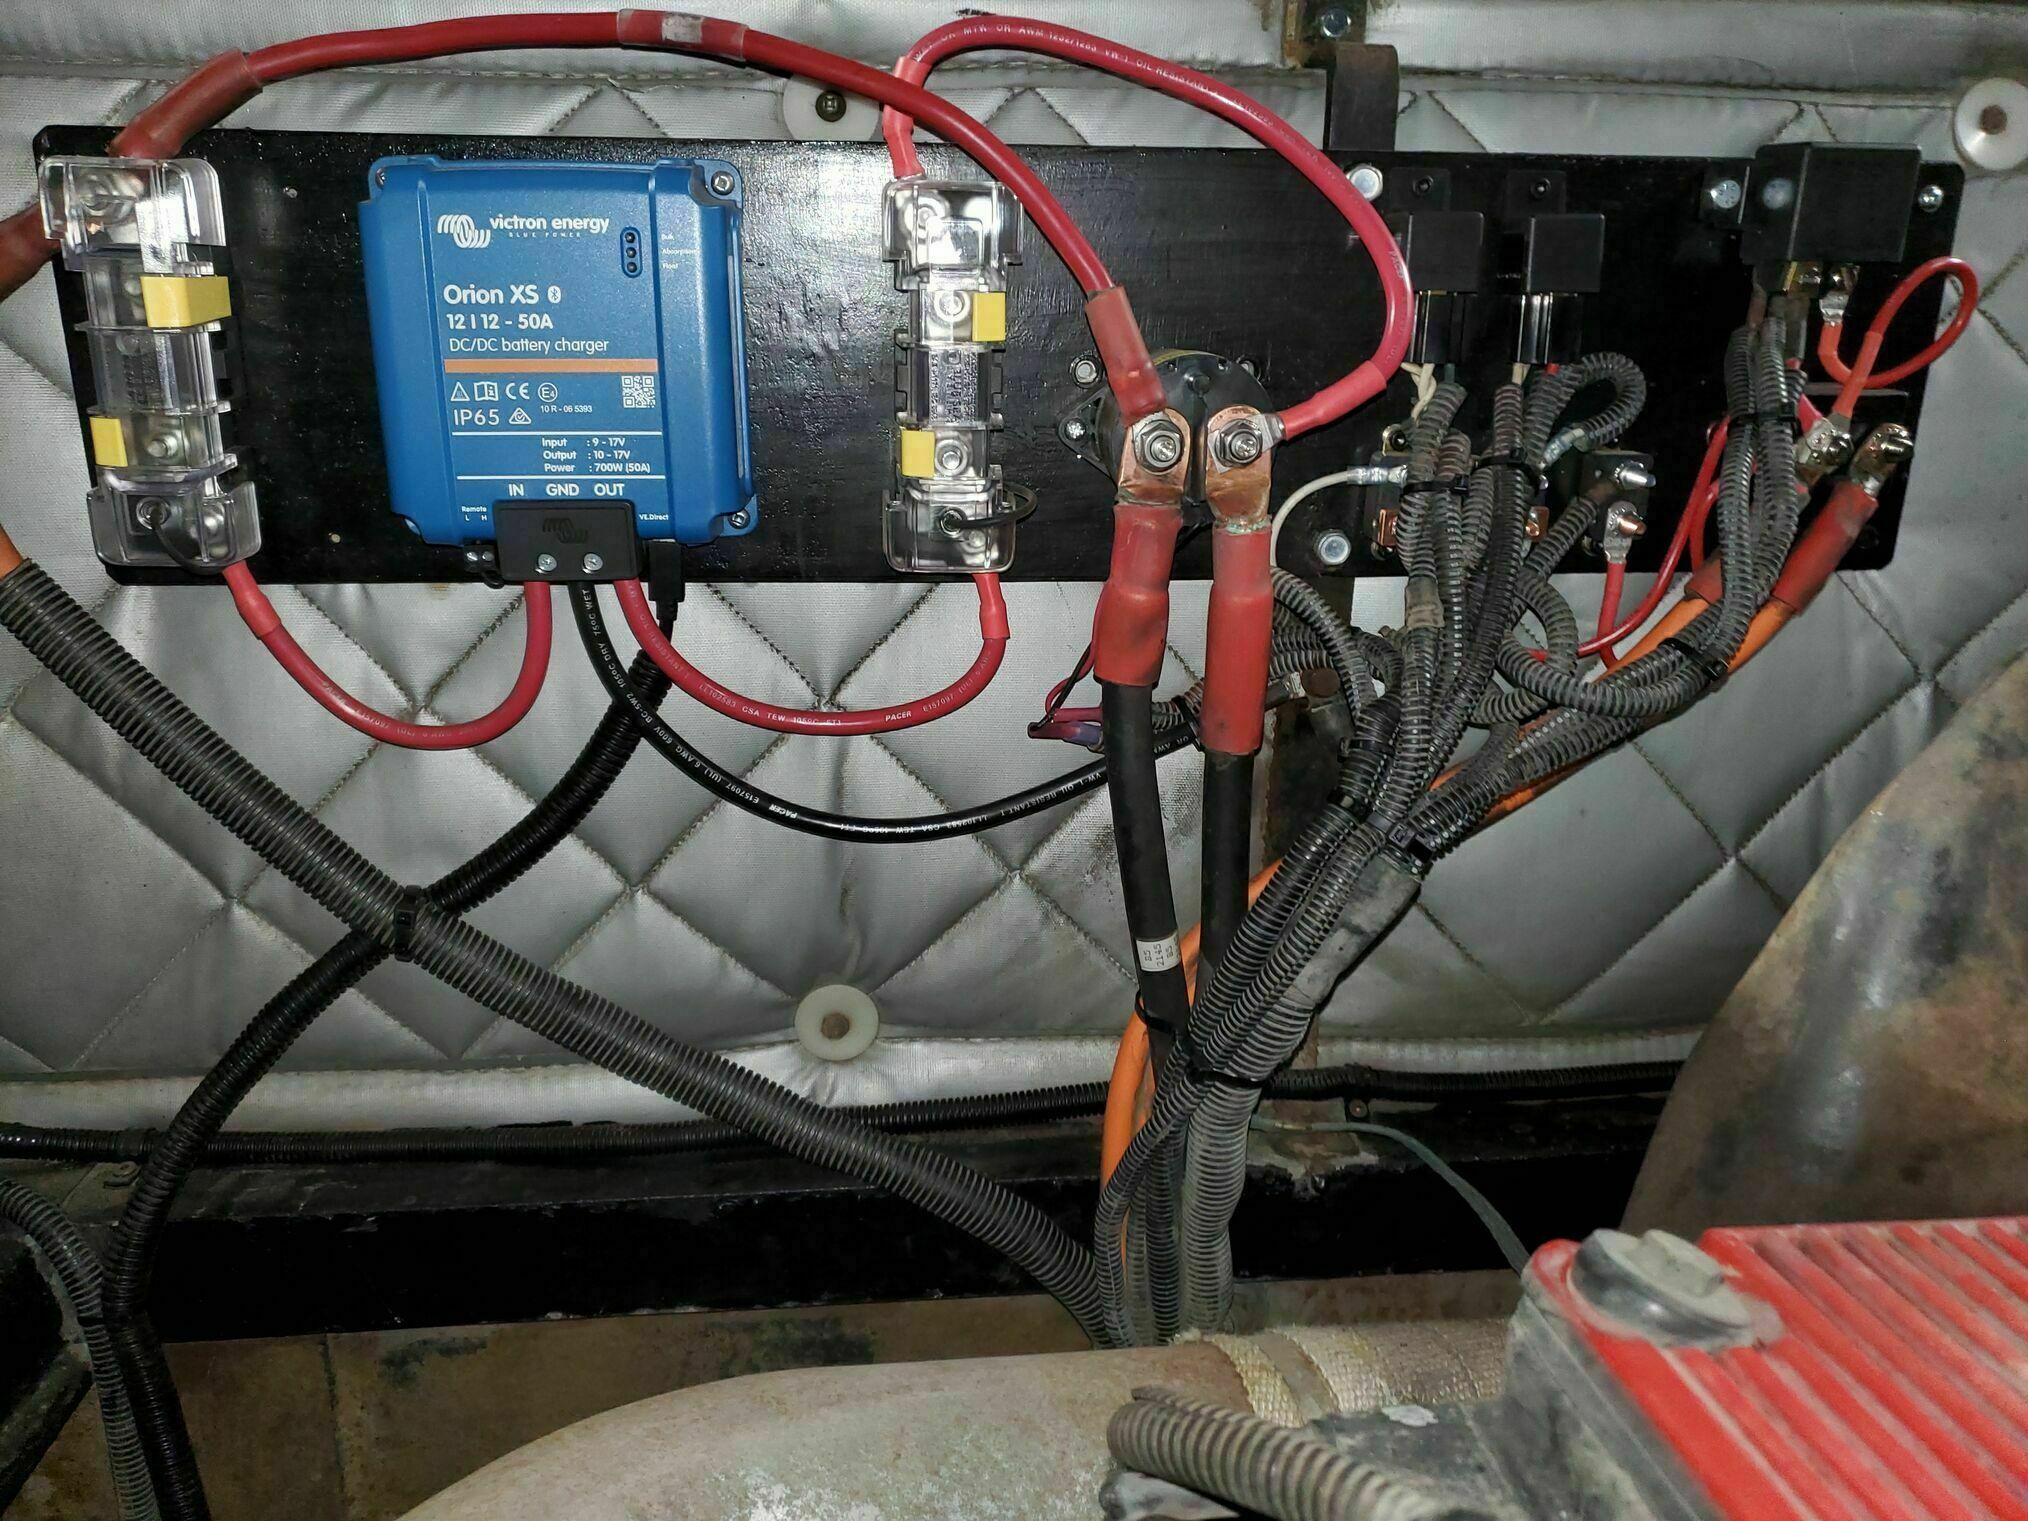
Here is the freshened and updated panel back in place. As I was replacing most of the parts, I simply unmounted each component, leaving the wiring intact. I was then able to remove the mounting plate and leave everything behind. Of course the house and chassis batteries were disconnected!
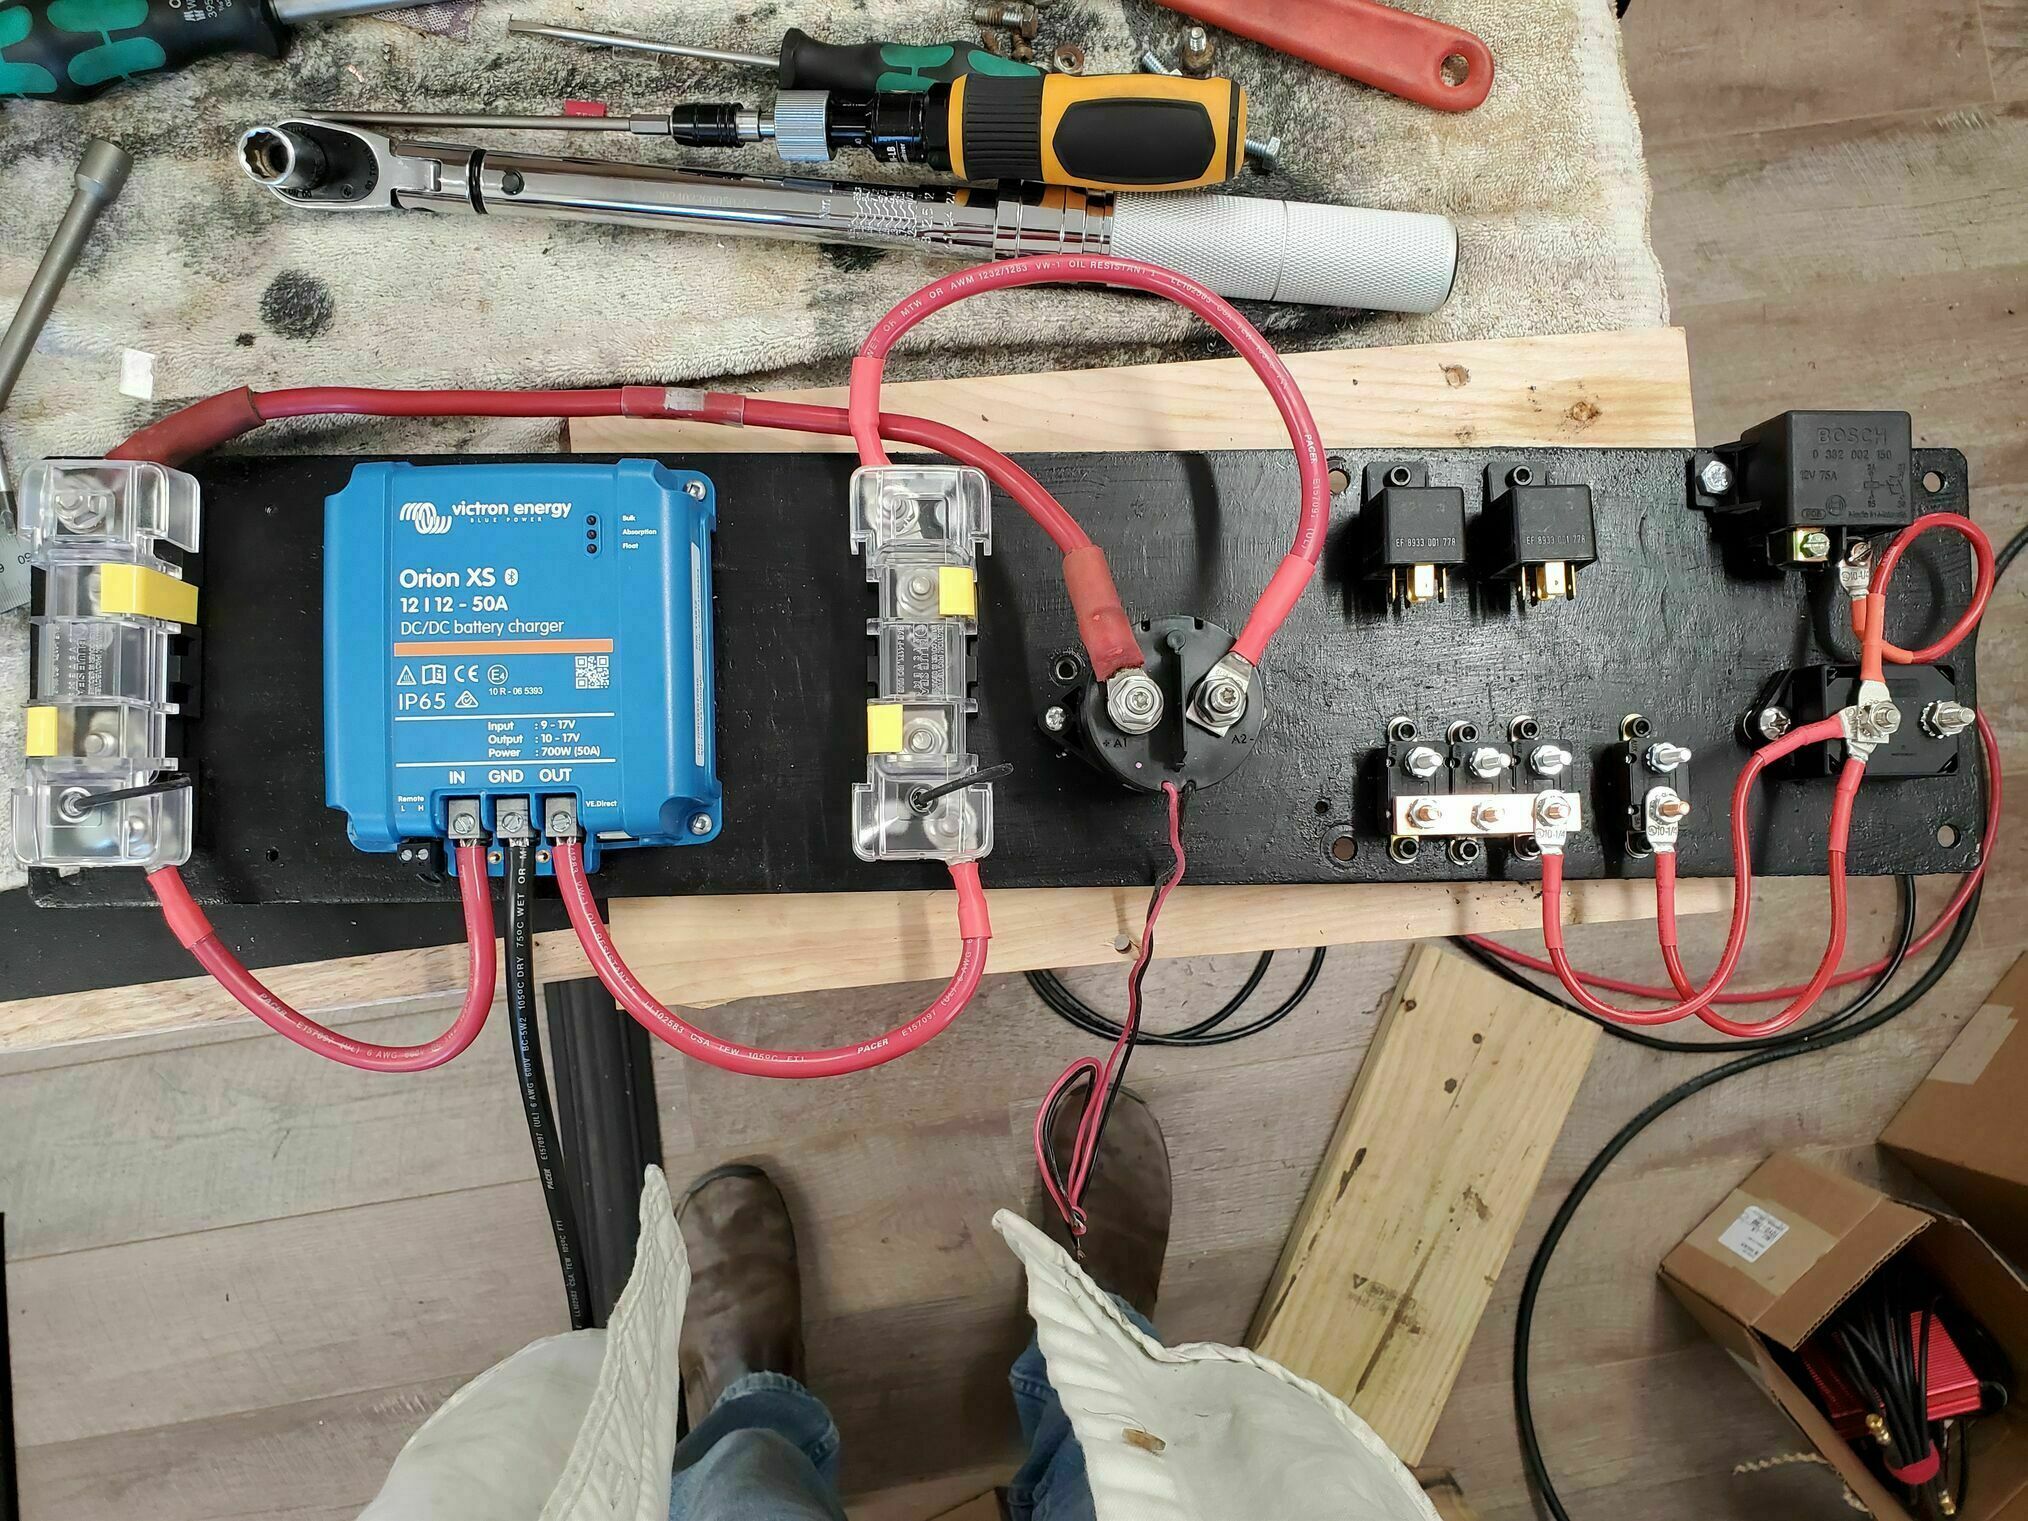
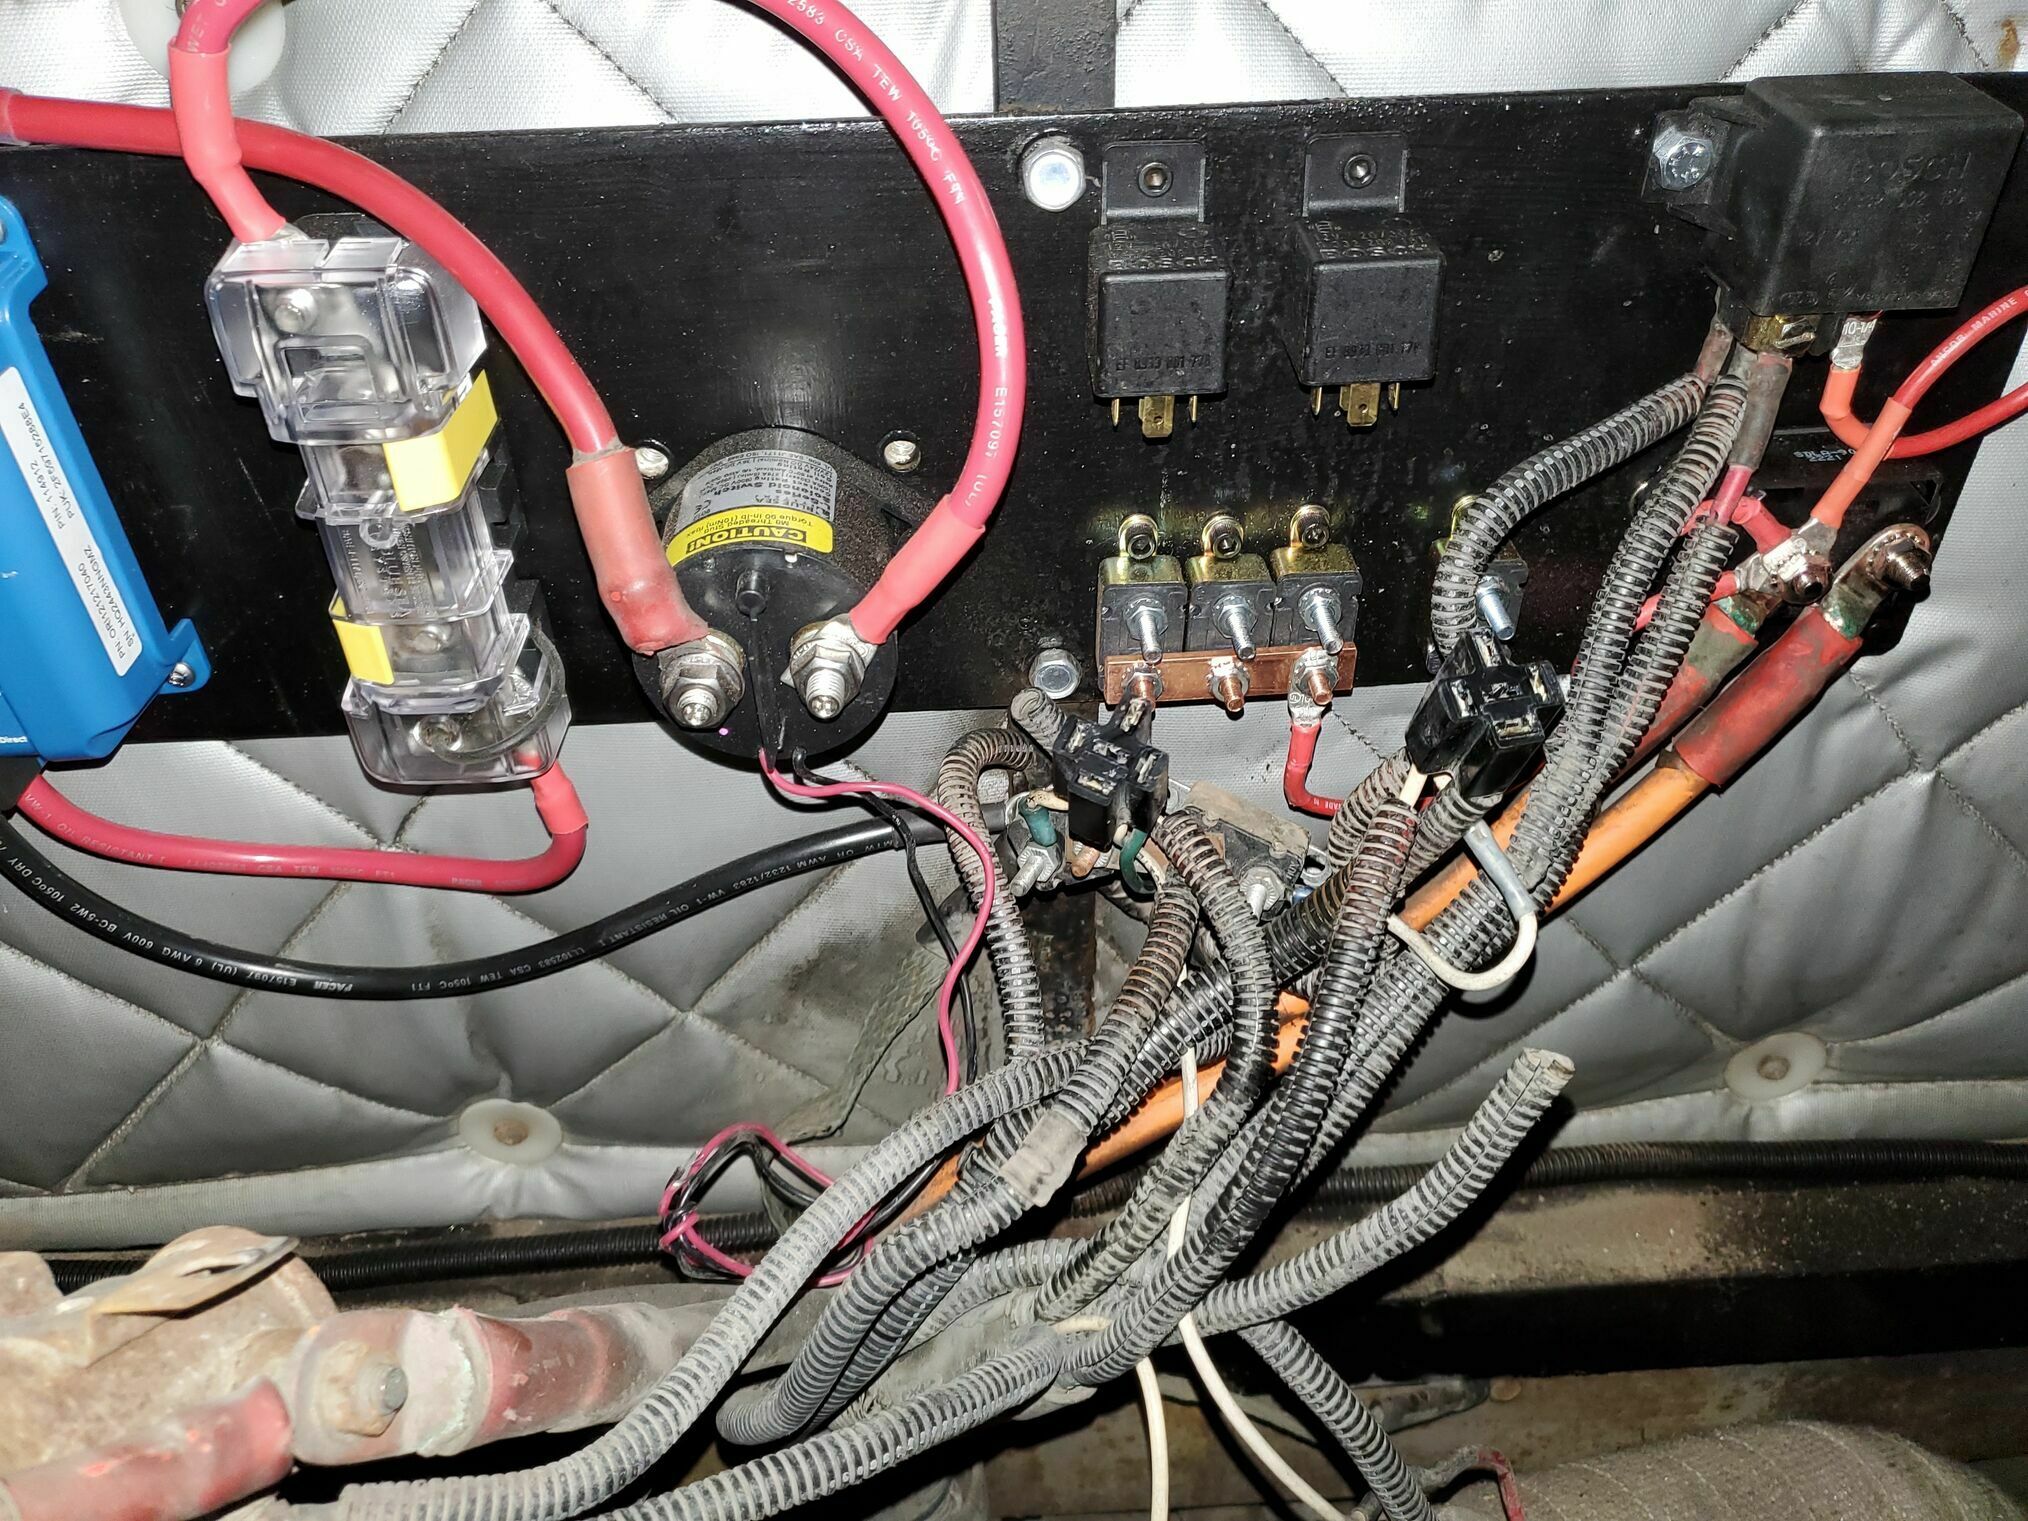
The mounting plate was cleaned, de-rusted, and painted with POR15. I then attached the new components to the cleaned plate and did what interconnect wiring I could while it was on the bench. Due to the length/location of existing coach cabling, things could not move much, at least without extensive effort, so they went back in the original locations. All of the mounting was updated to use rivnuts and cap bolts.
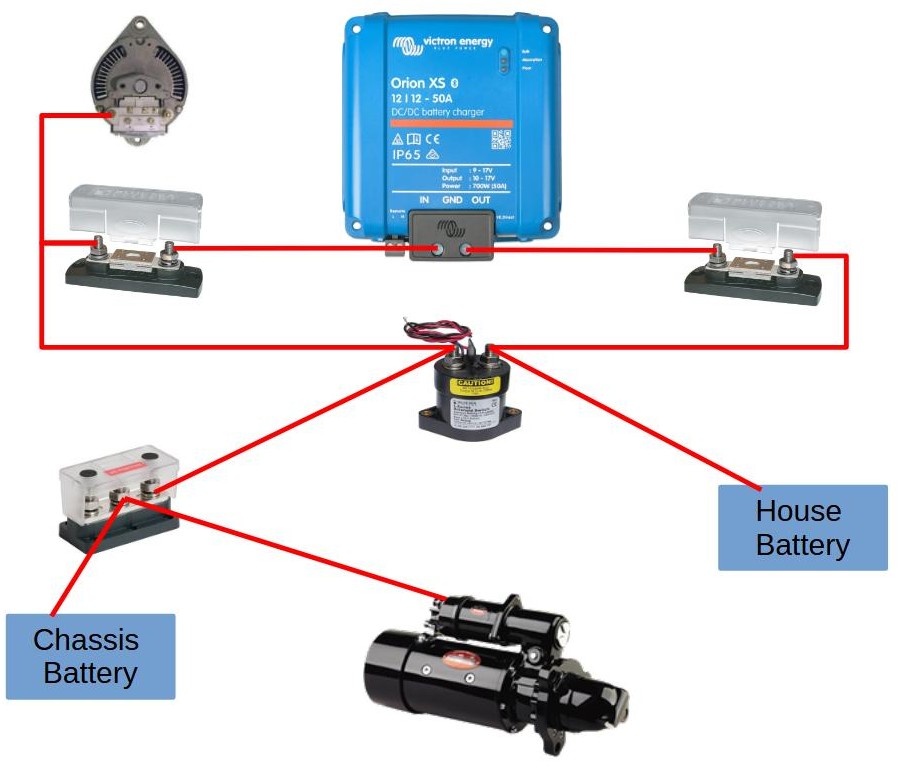
We followed what @Tommy D did over on ForeForums and used his photo as a guide. Here is my crude diagram of that wiring; no guarantees it’s error-free. The fuses on either side of the Orion XS 50 are Blue Sea Systems 7721 Fuse Blocks. These use the same mega fuses that I used in all of the Victron install. These have a fuse post and a lig post on each end which make the connections easy.
Parts
- The isolator was replaced with an Orion XS 50Amp DC-DC charger. This ensures the LiFepO4 are properly charged from the alternator.
- The boost solenoid was replaced with a more robust Blue Sea Systems 9012 unit.
- The remote start relay was a Tyco V23232-D0001-X001, and I replaced that with a Bosch 0-332-002-168 that I had saved from the Ignition Relay Update. The old Tyco is in the emergency spares box should I ever need it.
- The 90A breaker that feeds the ignition relays was replaced with a new Klixon SDLA-90.
- The remaining re-settable fuses were mounted on the plate and connected with copper bus bars to eliminate the extra wiring that had been added. These are all new components as well; the original ones had too much rust/corrosion on the posts to reuse. I got all of these from Wiring Products
- The plate was fastened back to the rear firewall, I added standoffs on the two ends so it no longer has a bow.
re-applied power, and no magic smoke was released 😁 Dash voltage gauges now respond normally as well. We will be making a few battery maintainer updates, more on that in a later post.


